Facebook Ads is complicated. There’s no getting around that. There’s a big learning curve every step of the way. You have to get used to the interface, learn best practices, understand the targeting system, and make calculated decisions based on bids, placements, and so much more.
Then, once you learn all this, the hard part still isn’t over. When you got to scale your campaigns in number and budget, the typical create-an-ad tool just didn’t seem to cut it. Power Editor was used to make bulk creation easier, but now both tools as we’ve known them are gone when Facebook merged them together.
In this Facebook Ads Manager and Power Editor tutorial, we’ll show you how to navigate it so you can more easily create and scale your campaigns under the new system.
What Is Power Editor, and How Does It Affect the Ads Manager?
Previously, when you clicked “Create an Ad” or “Manage Ads” on Facebook, you’ll automatically be taken to Facebook’s classic Ads Manager.
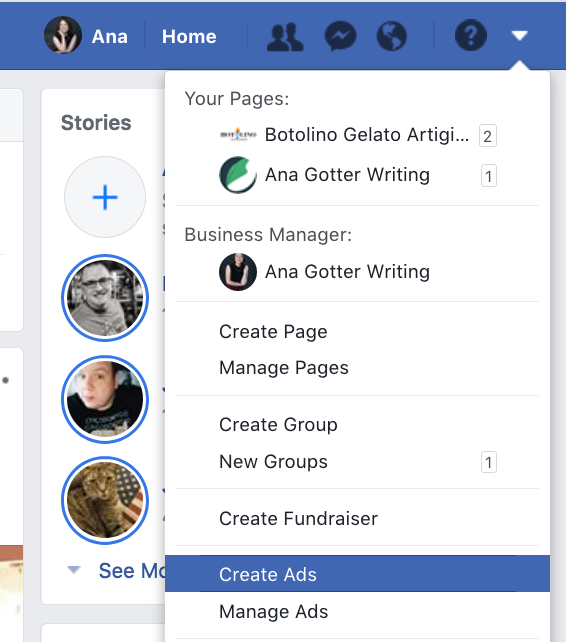
When you created ads through the conventional Ads Manager, it would look like this:
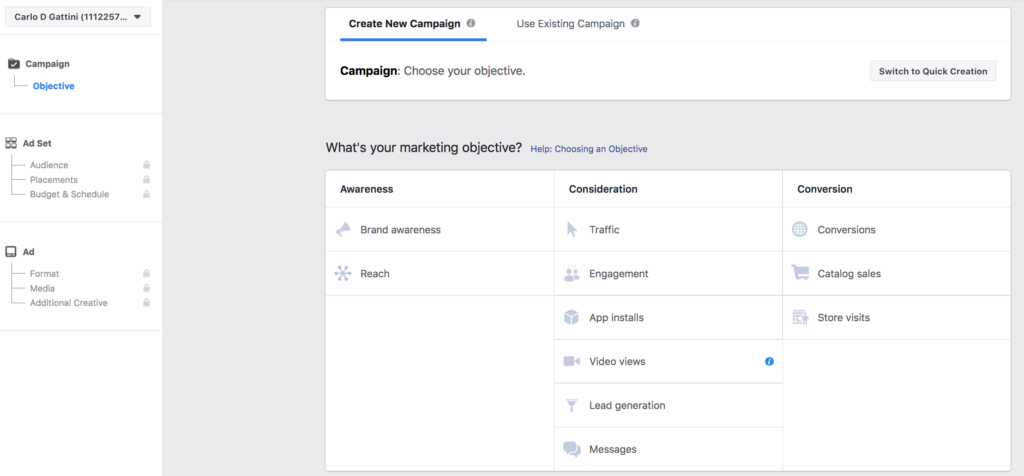
Ads Manager worked well when you’re creating a few ads at a time, and it was (and is) relatively straightforward and easy to use once you go through it once.
Power Editor, by contrast, was kind of like a different version of the ads manager for advanced advertisers. It’s designed to make it easier to create and manage edits in bulk, so for advertisers who have scaled their campaigns significantly and have a large number of ads, this is the way to go.
Power Editor was a must-have not only for large businesses, but agencies. The ability to quickly manage a large number of campaigns is a huge asset for agencies managing the ads for multiple businesses. Power Editor also typically got new advanced features first, like lead generation ads and Instagram Ads.
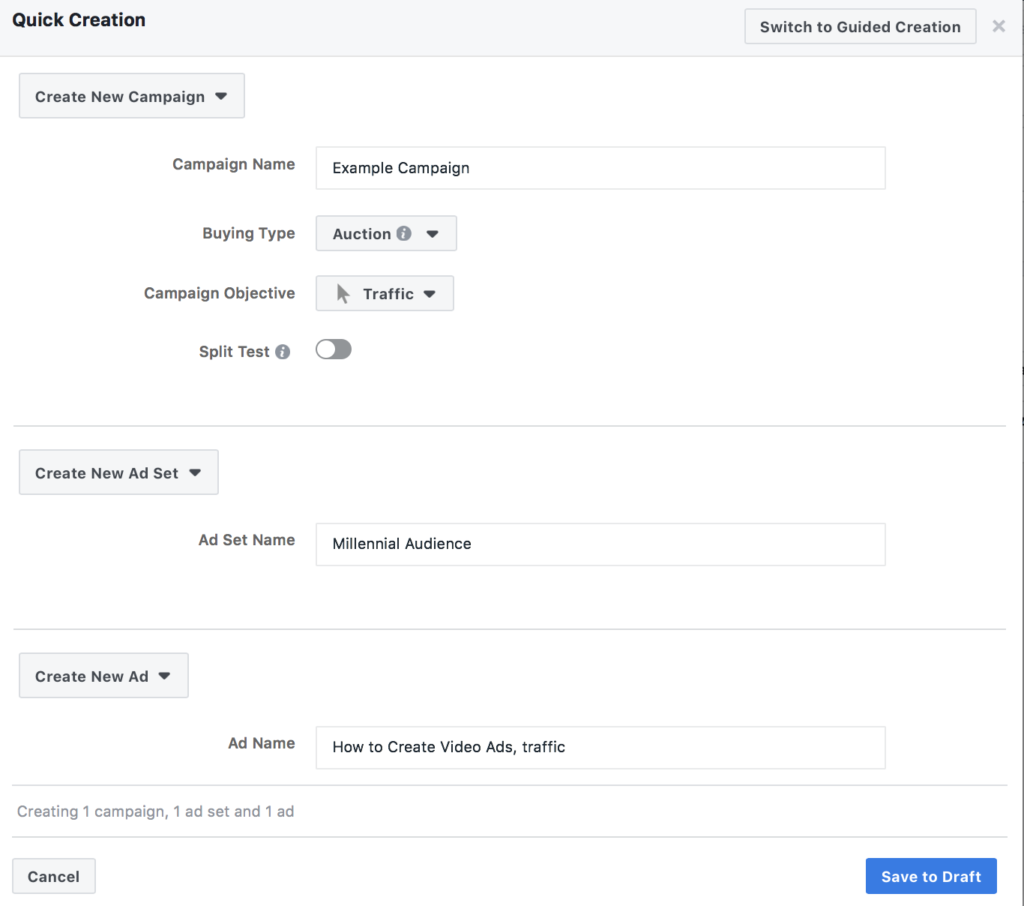
But, within the past few months, Facebook announced that it was merging Power Editor and the classic Ads Manager. Now, we have “guided creation,” which resembles the more traditional Ads Manager pictured above, and “simplified creation” (pictured below) which reflects the Power Editor interface.
Where to Access Facebook Ads Manager & Power Editor
In case this is still confusing, Power Editor used to be accessible through a direct, specified link or through the Business Manager. This was a completely separate URL from the typical Facebook Ads Manager.
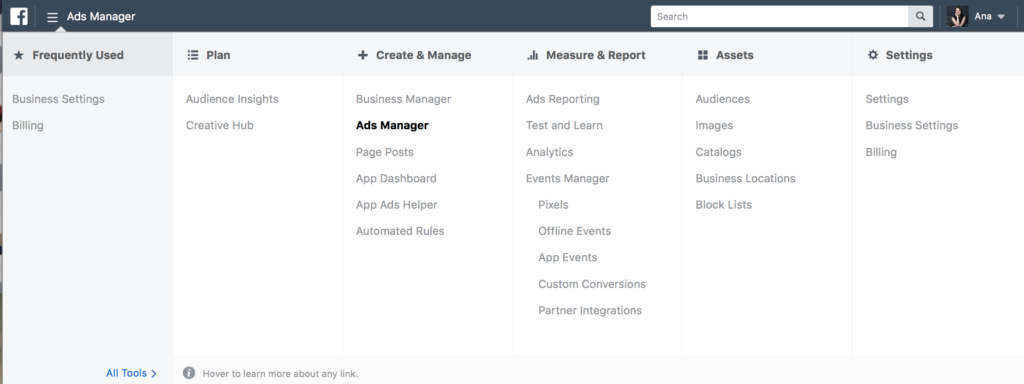
They have now merged, and you can only create ads through the Ads Manager. There are, however, two different types of ad creation that you can find here: the Guided Creation, and Quick Creation.
You can access the Ads Manager by clicking on “Manage Ads” in your main navigation bar, or by finding it under the Business Manager.
To take advantage of the speed of Power Editor, use the Quick Creation option.

How to Navigate The New Facebook Ads Manager
So before you actually get started here, it’s important that we go over how Facebook Ads are actually structured.
There are three levels of the ad creation process: Campaigns, Ad sets, and Ads. Multiple ads can belong under an ad set, and multiple ad sets can fall under a campaign.
The campaigns state the objective, or the goal of your ads. This determines whether you want to drive traffic to your site, get engagement on your post, and so on.

Ad sets determine targeting, scheduling, budget, and the placements (newsfeed, right side ads, Instagram Stories, etc.) you choose for your ads.

The ads are the actual ads that run; this is all about the creative, letting you customize the ad format, text, and destination URLs.

So, if you wanted to create multiple ads that target specific users to try to get sales on a certain product, those should all be grouped under a single campaign.
Once you know this, it’s easier, because you can view campaigns at the campaign, ad set, and ad level. You can pause a single campaign, stopping every single ad set and ad underneath it, or go to the Ad level and pause or edit a single ad there. This will help you find what you need quickly.
Creating an Ad in Power Editor’s Quick Creation
I’m going to go rogue here, and still call this “Power Editor’s” quick creation, because it’s almost exactly what we were used to with Power Editor. This is the tool you’ll use when you want to create and scale your campaigns quickly.
The Quick Creation doesn’t hold your hand through the process quite as much, which is why we’re covering this in our tutorial and not the Guided Creation. I highly recommend that newbies use the Guided Creation the first few times to get the basic idea, and then switch to Quick Creation to scale.
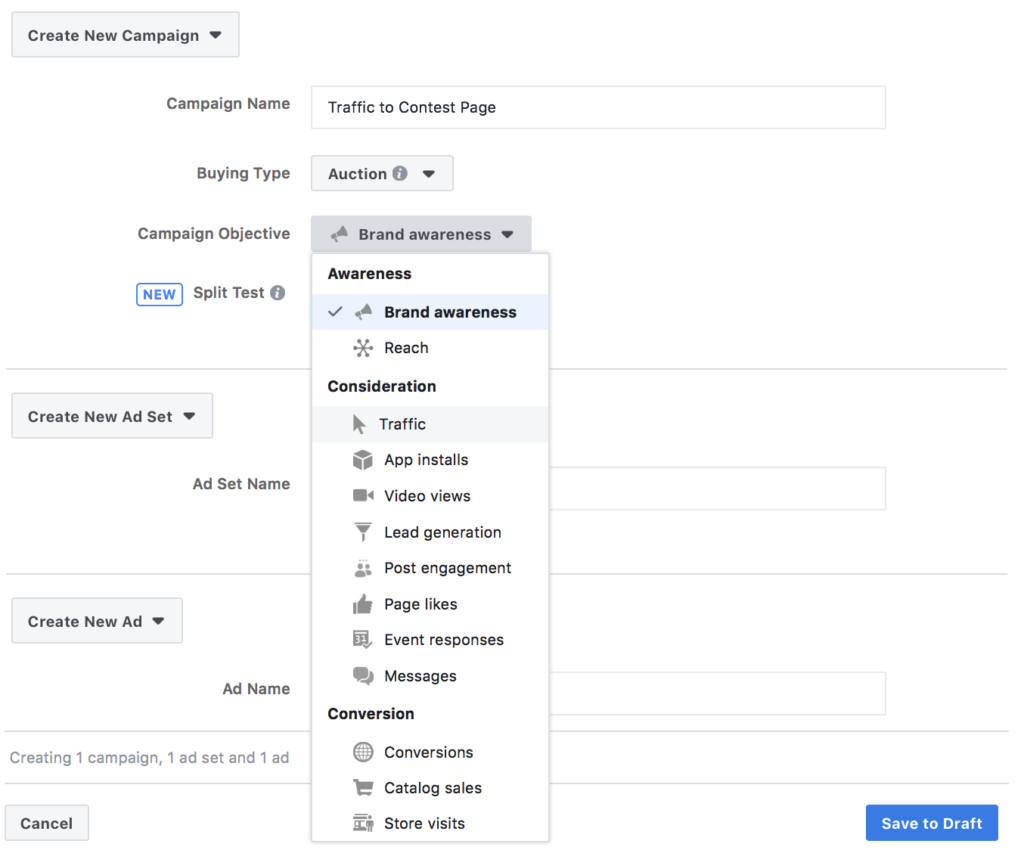
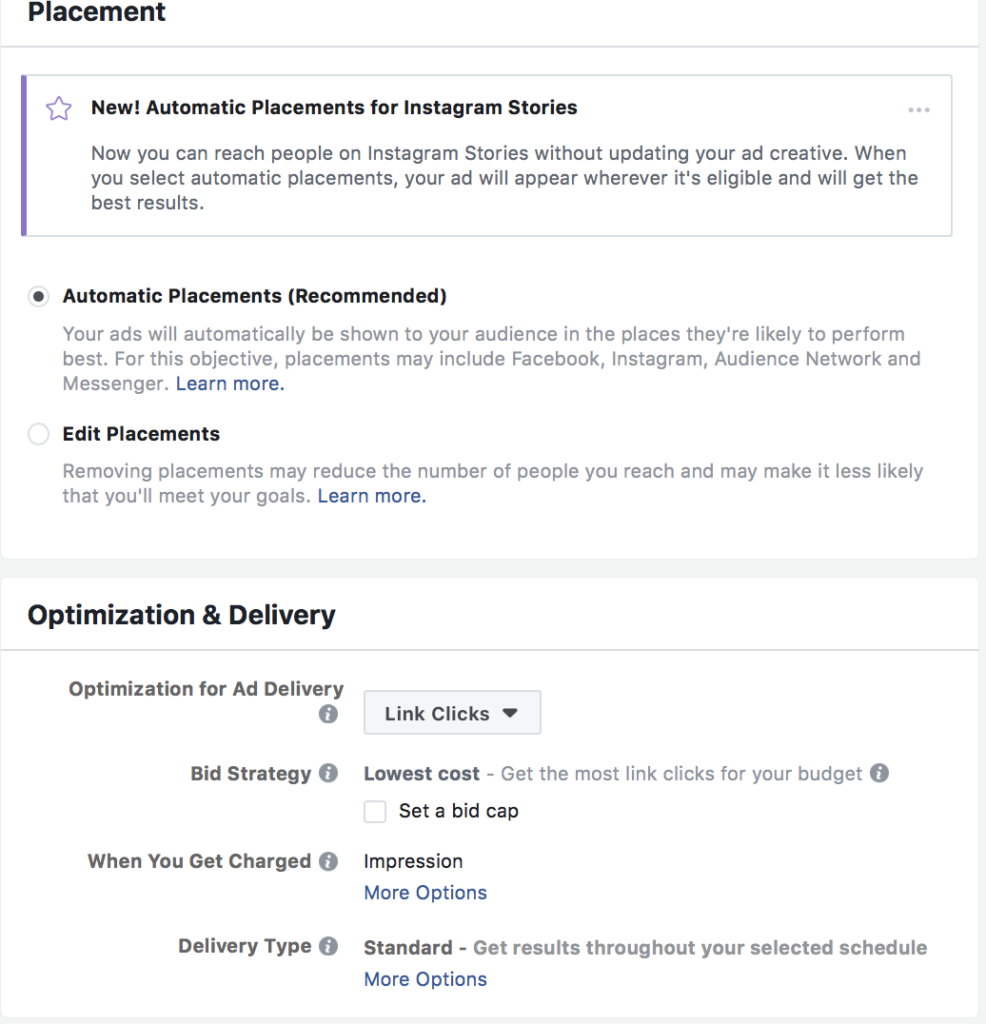
Once you do this, you’ll be able to create your Ad Set underneath this. if you haven’t yet created your ad set, I recommend doing this before going on to create the ad itself by naming it and then clicking on “Save to Draft.”

Once you do this, you’ll see the Ad Set page, where you can define targeting, budget, scheduling, and more.
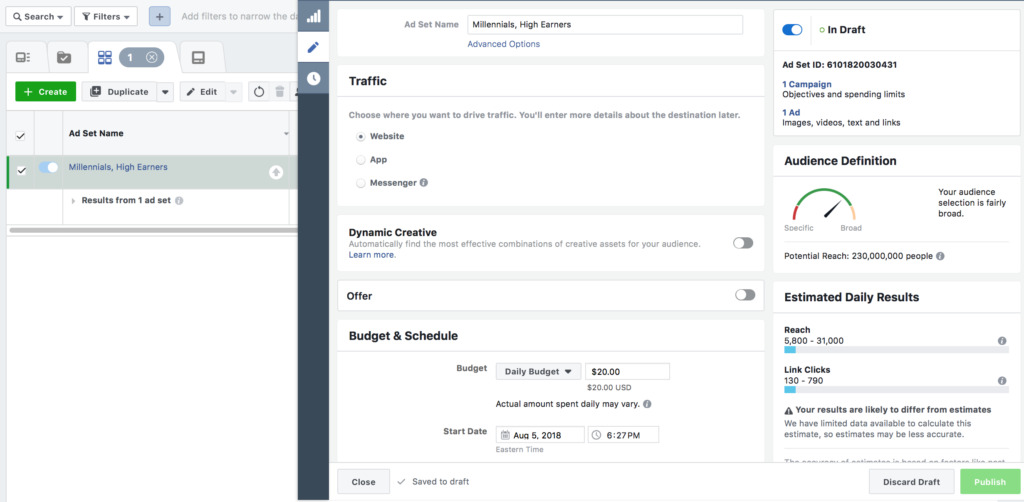
Go ahead and set your criteria here. Note that you can click on more advanced options in each schedule to set up things like manual bidding or dayparting for your ad campaigns. This will look similar to the Guided Creation, though the sections may be in a slightly different order from what you’re used to.
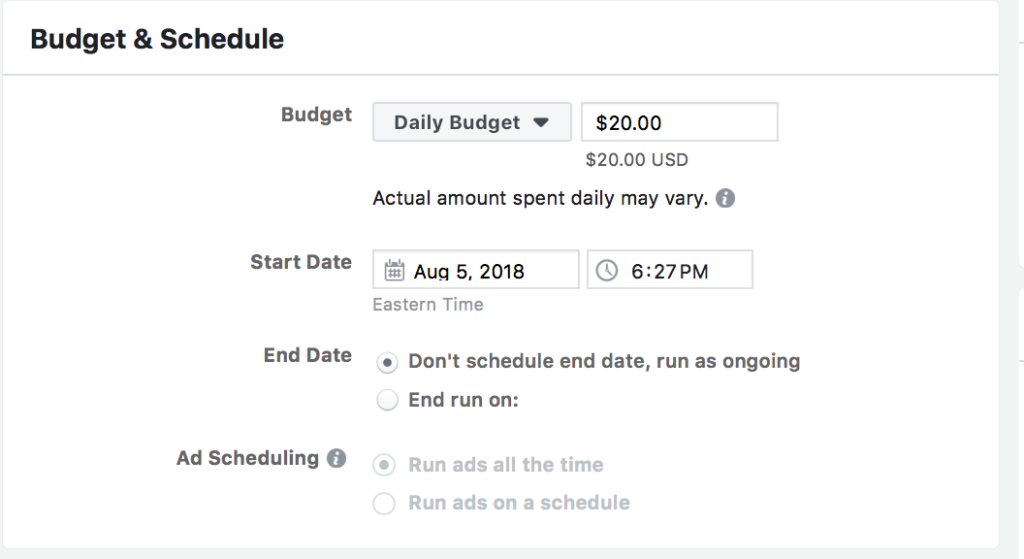
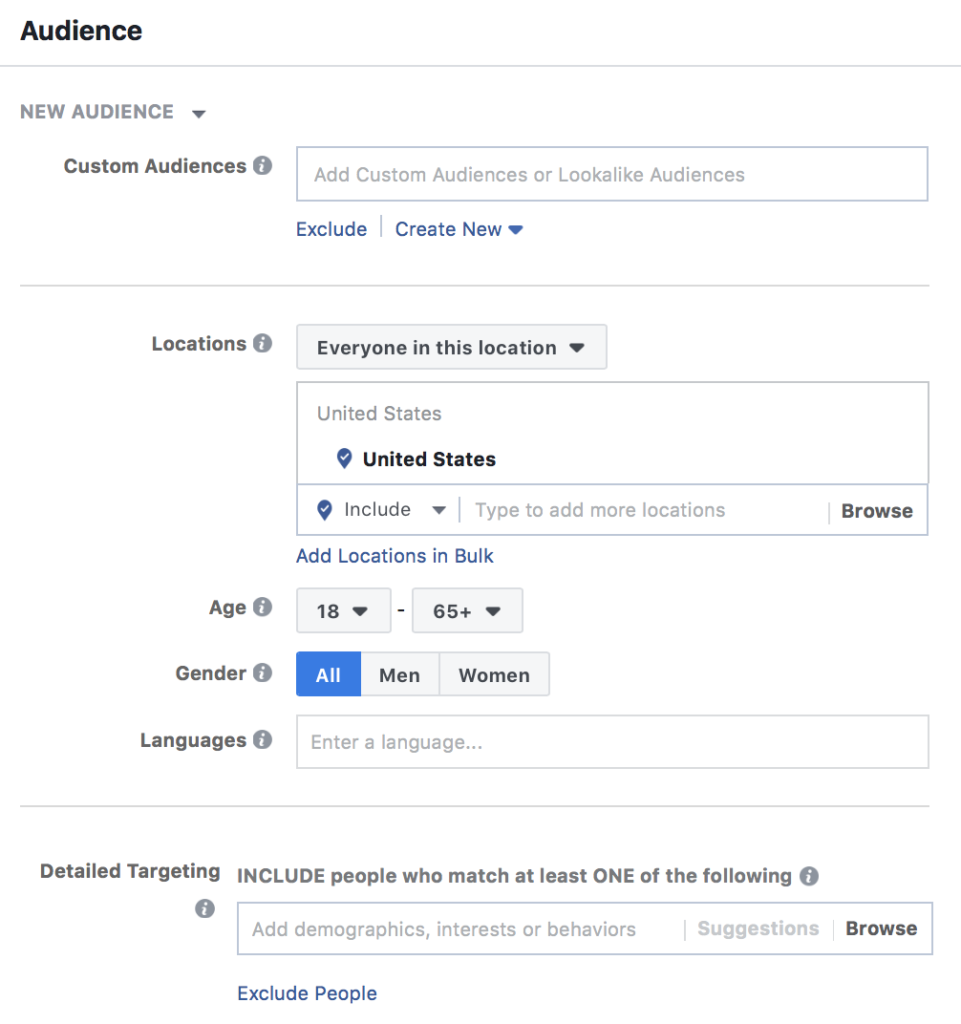
Once you do this, click to the Ad tab in the left navigation bar,
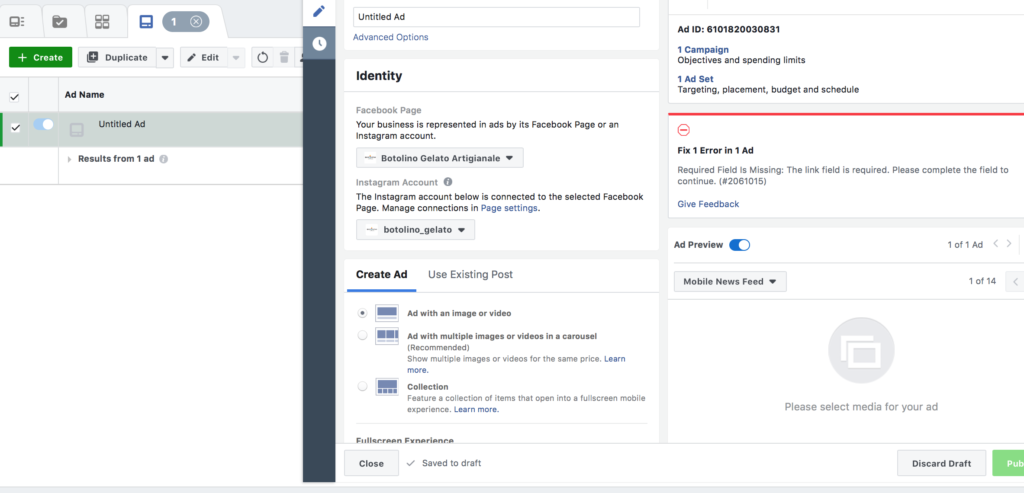
Here, you can create your ad. Choose the format (image, video, carousel, etc), enter your headline and description, and choose the creative. Once you’re done and your ad is created, make sure that you check it out on the right hand side preview so you can see how it will look for every placement. As you’ll see in the example below, sometimes images are cropped weird. You can also choose separate images for Instagram if you’d like.

How to Use the Ads Manager’s Filters
Once you’ve actually created your ad campaigns, it’s important to know how to find the exact ads you’re looking for. This is true whether you want to take action on them, or just review them and compare them against each other.
What were previously Power Editor’s exceptional filters have been transferred to the new Ads Manager, making it much more functional. This allows you to sort your campaigns and ads by different factors like metrics, audience targeting, performance, and delivery status.
You can find your filters in the Ads Manager’s top left hand corner.
Here, you’ll also see the Search function, so if you’re looking for a specific campaign, ad set, or ad, you can find it by searching for its title of keywords. Because of this, I always stress carefully naming each level of the ad so that you can find it if needed. It’s not a huge deal if you’re running fifteen campaigns, but imagine trying to search for one out of fifteen hundred. Different story.
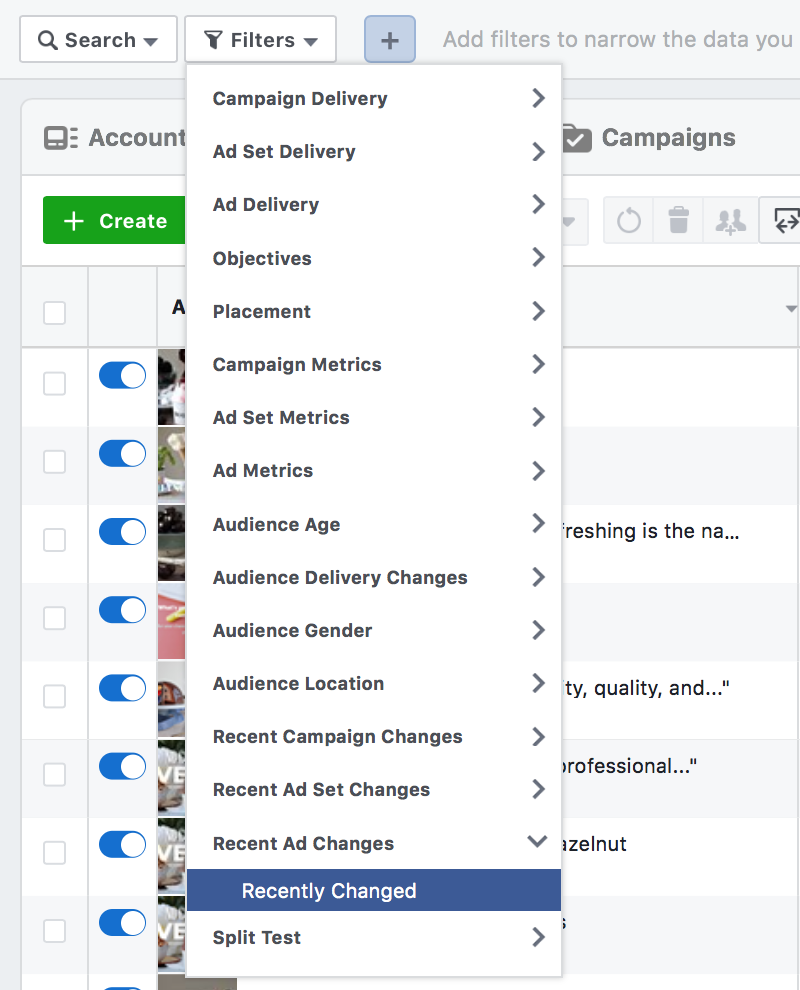
The filters let you get specific, too. Let’s say you want to view all your ads that have a frequency higher than a 3, because once frequencies start to get higher the performance typically starts to drop off. You can use the filters to quickly find these campaigns, and then pause or adjust them if necessary.

You can also find campaigns that are getting great results and add more of your budget to them, or look for comparisons between your campaign. Overall, these filters will help you not only manage your ads, but spot important trends in their performance that will help you create high performing ads in the future.
Final Thoughts
The Power Editor version of the Create-An-Ad can feel a little confusing at a first glance, but for businesses and advertisers who want to scale their campaigns and run more ads, it’s an exceptional tool that will make this process a lot easier. The more ad campaigns you create, the more you’ll need it You can always switch to Guided Creation (aka the previous create-an-ads method) with a single click, so there’s nothing to lose.
What do you think? Do you use Power Editor, Ads Manager, or a third party ad solution? Which do you prefer and why? Share your thoughts and questions in the comments below!



1 comments On The Complete Facebook Ads Manager & Power Editor Tutorial for Advertisers
Pingback: The Complete Facebook Ads Manager & Power Editor Tutorial for Advertisers – Just Internet Marketing ()
Comments are closed.