
Homebuyers demand video, and YouTube is where they go to find it.
According to The Digital House Hunt, a joint study by Google and the National Association of Realtors, 51% of home shoppers looked for information directly on YouTube as part of their home search. And that makes sense. Video is highly accessible and highly engaging. Unlike text-only articles, it does’t just tell a story, it shows a story.
Realtors can use video in many ways to boost sales, and setting up a YouTube channel is the first step. It’s free for a Realtor, or anyone else, to open a YouTube channel. Setup takes about 10 minutes. You’ll be ready to start promoting your listings today. (Click Read More to get started with step one.)
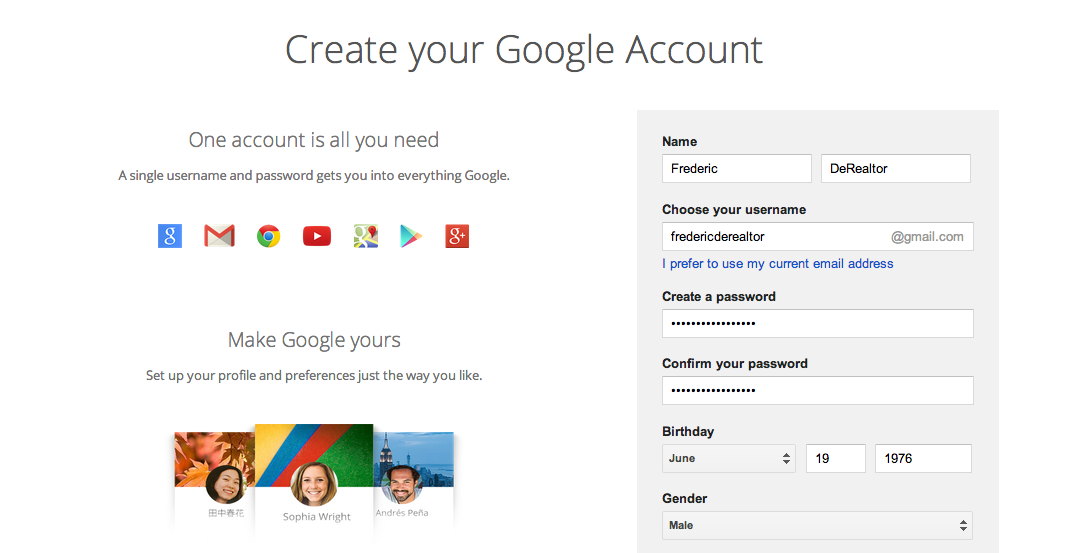
STEP ONE
First open a Google account specifically for your business. You’ll need to enter your name, the email address you’d like to use on Gmail, and a few other items. Birthday, gender and phone number are optional, not required. If you already have a Gmail account for your business, skip to step 2.
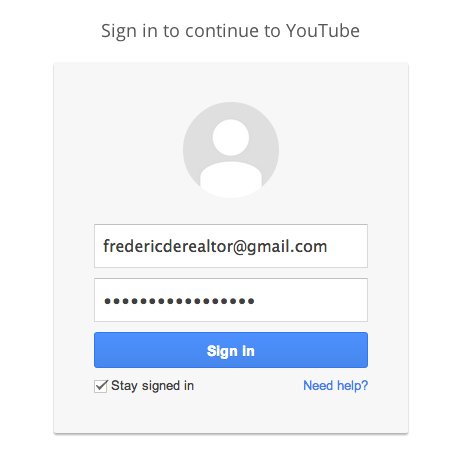
STEP 2
Now go to youtube.com and sign in with your business account. If you’re already using Gmail, you may have to sign out of your personal account, first. Don’t worry, there’s a link to sign out on the same page as the link to sign in. Google made it easy!
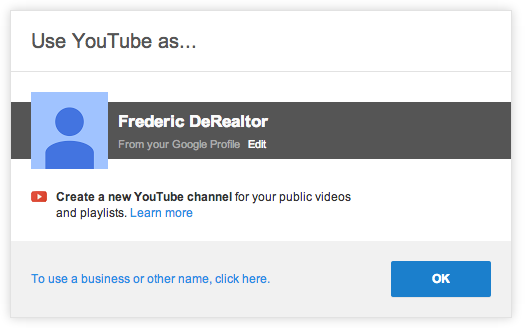
STEP 3:
Create a new YoutTube channel specifically for your company. It’s hard to find this option on the YouTube homepage, so if you have trouble, just follow this link:
https://www.youtube.com/create_channel
You’ll see a screen like the one below. Make sure to click “To use a business or other name, click here”. Don’t just click “OK”.
You’ll be asked to give your channel a name.
This should probably be your name, or the name of your agency, if you’re an independent agent. Some larger agencies have strict rules about how agents can use the corporate name and logo, so be careful to keep your corporate minders happy! Also avoid tagging extra words like “online” or “vidoes” to the end of your channel name. The internet isn’t new. People don’t need to be reminded that they’re using a computer. In 2014, these terms sound quaint and make your channel harder to find when potential customers search.
Another option for naming your channel is to use the name of your area and the type of real estate your deal in. For instance, Northern Mississippi Homes or East Nashville Commercial Property. How do you choose which way to go? If you’re a well-known realtor with lots of name recognition, use your name. That’s what people are likely to search for and recognise. If you’re just starting out or are in a highly competitive market, you might opt for the location + description option.
I also highly recommend that you add your picture to your account. Putting a face with the name goes a long way toward establishing trust with customers.
After you name your YouTube channel, click OK and you’ll be ready to get started uploading videos of your commercial or residential listings.
STEP 4:
Start uploading your videos.
STEP 5:
Perhaps I skipped a step. You’ll need to make some videos to upload to your channel, and show off your listings. You have several options for creating videos.
- Hire a professional. This is the most expensive option, by far, but produces results that are in-line with the price. Generally this kind of video only works for high-end properties that will generate high commissions (and can cover the production costs). A professional home tour video usually costs about $500, though costs can be higher depending on your area, the caliber of your producer and the size of the home.
- Do it yourself. If you have some experience with software like iMovie or Windows Movie Maker, you can make a quick home tour on your computer, using photos or video clips from your smartphone. With this option, you have to be especially careful to make it look professional. Remember, this may be the first impression you make on a potential buyer. I do not recommend just uploading a raw, unedited video clip you took walking through the home. You might give homebuyers motion sickness.
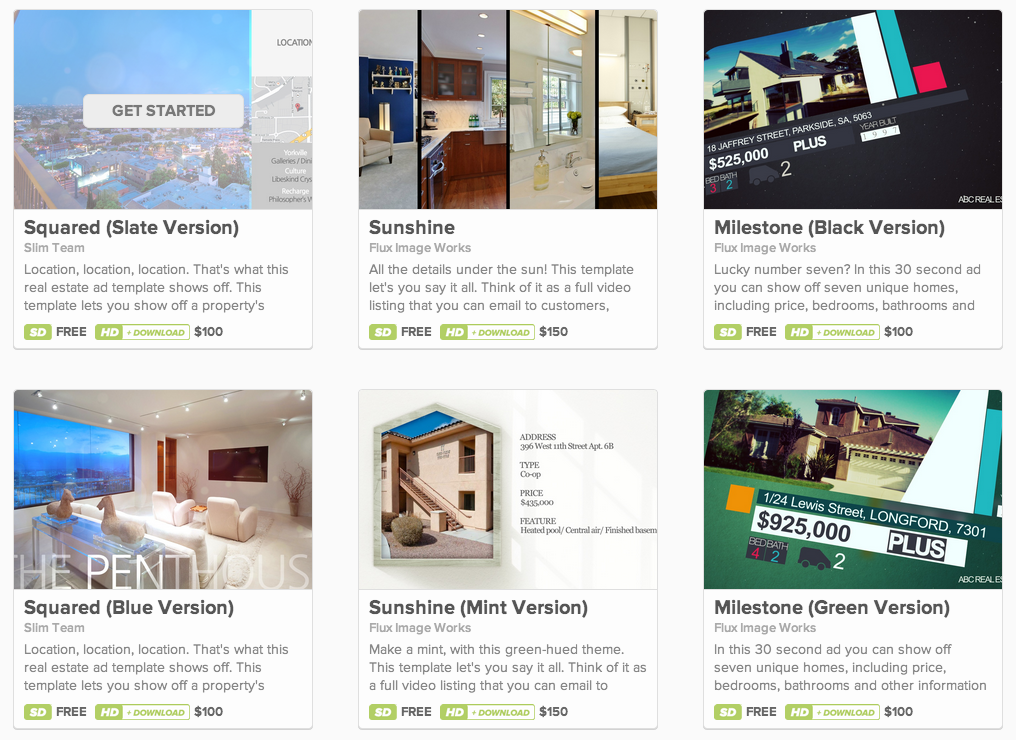
- Cheat. Well, I don’t actually mean cheat, but this solution sure feels like cheating. Gather up the pictures of a property (or group of properties) you want to feature and go to the real estate section of Shakr.com. Look through a few of the templates an pick one that meets your needs. Drag the photos into place and a few minutes later you’ll have a high quality video that will impress your customers. You’ll probably spend about 15 minutes creating the video. If you like the results, you can download a YouTube-ready HD version for about $100. It’s about 20% the cost of hiring a professional, and the results are an order of magnitude better than the DIY method.
Good luck! Here’s a step-by-step guide on how to make a video with Shakr:
Here are a few examples of real estate channels on YouTube that I like, to help give you ideas: