Facebook Live came with a big boom, with marketers and users alike both rushing to test out the new video platform. This was over a year ago now, and while other platforms have introduced their own live video, Facebook’s continual addition of new features keeps theirs in marketers’ favor.
Some of these features, however, are a little difficult to figure out how to use, and it’s not immediately evident how to access them at a first glance. Since Shakr is your go-to resource for everything video, we wanted to create this tutorial to show you how to use these 4 incredible Facebook Live features to get the most out of your broadcasts.
Share Your Screen
Did you know that you can now share your screen on Facebook Live natively through Facebook? Previously, this was only available with third party software, but for Chrome (and possibly some Firefox users), screen sharing is now easy to use without any additional tools.
Sharing your screen has a large number of beneficial use cases, including the ability to take users on step-by-step walkthroughs through your software.
Before you start your Facebook Live, you’ll see the option to use different cameras and microphones. Underneath the option to choose your camera, you’ll see the “Share Screen” button.
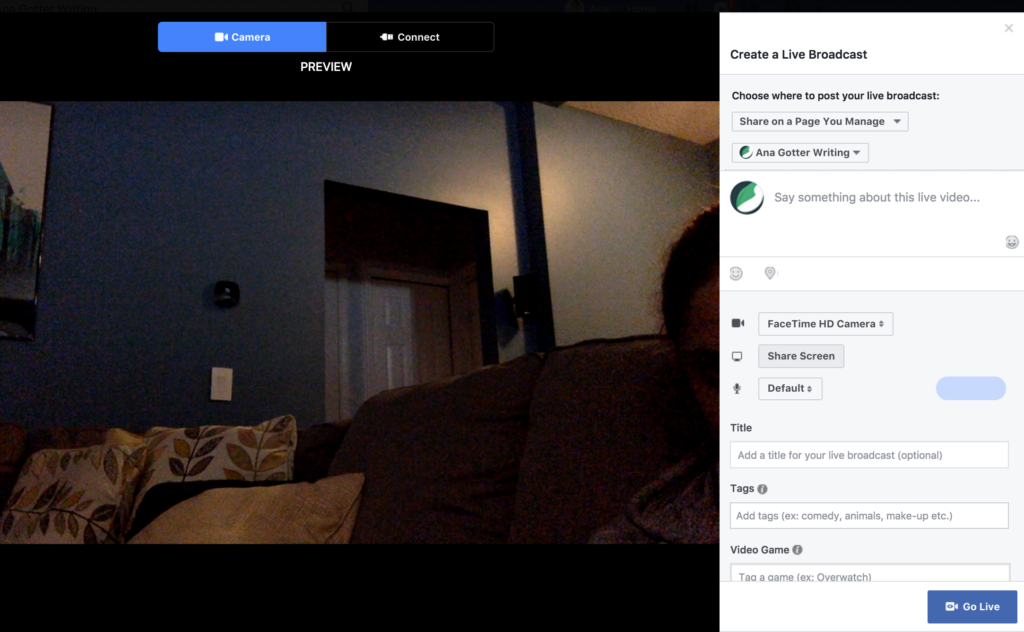
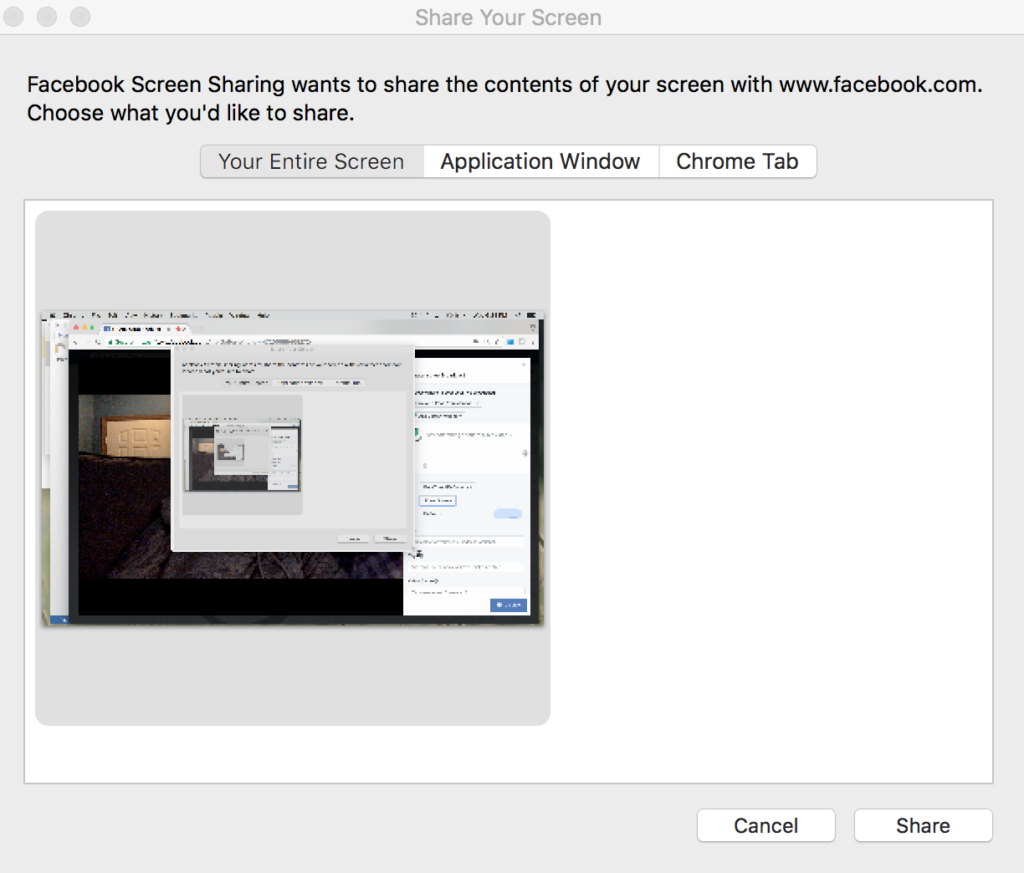
Once you click this (and after it takes several seconds to load), you’ll see the option to choose what portion of your screen you want to share. You can choose from your full screen, a full tab, or a specific application. In most cases, I prefer choosing tabs or specific applications, and just remember to make sure you don’t have any confidential, controversial, or compromising information anywhere users can see it. This includes client information, scheduling information, or passwords.
Screen share Facebook Lives can be recorded just like regular broadcasts. Because the live video takes up so much of the screen, remember to check back in and look at the engagement if you’re only focusing on one or two tabs or screens so you can address questions and comments throughout.
Schedule Your Live in Advance
Promoting your Facebook Live broadcast in advance can significantly help you increase engagement, attendance, and shares. One of the most effective ways to promote your Facebook Live in advance is to actually schedule it in advance.
This creates what I call a placeholder post that will appear on your Page announcing the time and description of your live. This can be shared, and users can sign up to be notified when you go Live in case they forget. It also creates a pre-Live “discussion room” where people can ask questions and discuss the Live or subject with each other. If you’re asking for people to ask questions for a Q&A or share their thoughts to discuss, this is a great place to encourage them to share.
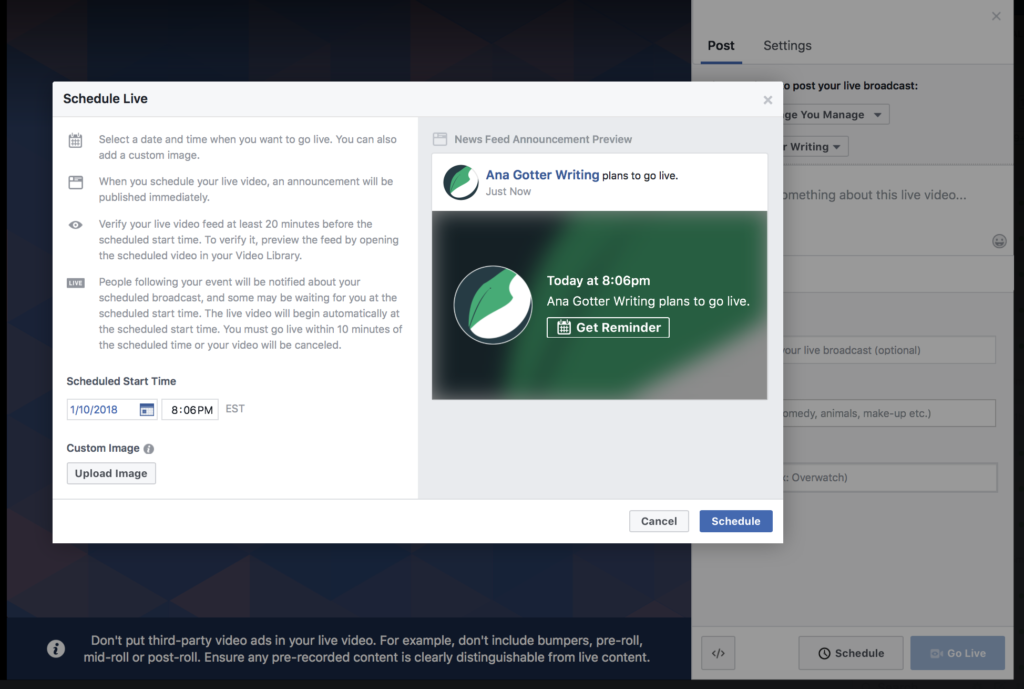
In order to schedule a Facebook Live, navigate to your Page’s publishing tools, and then click to your Video’s section. You’ll see the “+ Live” button that lets you create and schedule Facebook Lives.

This will bring you to a pop-up where you can enter in your Live’s title, description, and tags. Make sure to fill these out, because they’re important in promoting and explaining your Live. Once you do this, you’ll see the “Schedule” button at the bottom next to the option to go Live. Click it.
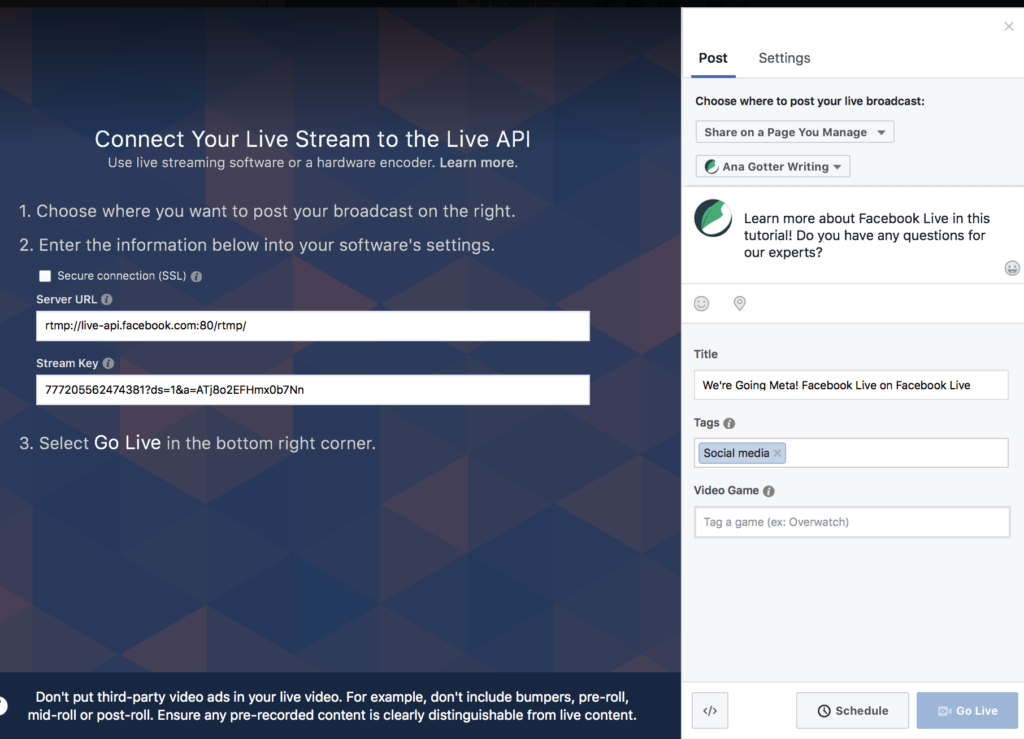
Choose your Live’s scheduled start time and date. You can also add a custom image.
Have Multiple People Broadcasting
Have you seen the Facebook Lives where there’s a split screen, with two people on the broadcast in real time? This is a feature that most other live platforms have adopted (including Instagram Live), but with Facebook there has been a bit of a delay. While some people have the capability to invite users to join their broadcast, this is only possible if they have the exact right equipment set up. Because of this, the best way to do this is to use third party software and have all your ducks in a row in advance.
In order to utilize the software best, start by scheduling your lives in advance. Then, you can hook up your third party service and connect it to your scheduled live, and have everything up and running from the beginning.
My personal favorite software that I’d recommend is BeLive, but other options include Ecamm Live and Crowdcast.
Granting Access to Others
Sometimes you don’t even need to be in a Live for it to still promote your business, but it certainly helps if it’s run through your Page. Now, you have the option to give any specific individual Live-only access to your Page for a specific amount of time. These people are called Live Contributors. You could, for example, give big-name influencers access to host a Live where they discuss a topic relevant to your target audience and answer any questions or concerns. This can drive a lot of traffic and engagement and help earn you a lot of attention, too.
Live Contributors can only go Live from the Page on a mobile device. They cannot:
- Comment as the Page
- Post as the Page
- Create ads
- View insights
- Access publishing tools
This allows you to maintain the security of your Page while still allowing influencers to host Lives as needed. You can, of course, remove them immediately after the Live is over.
To assign someone a role as a Live Contributor, go to your Page’s settings, and go the Page Roles section. Enter the name of the individual into the search bar, and select them when they pop up. Then choose “Live Contributor” and hit add.
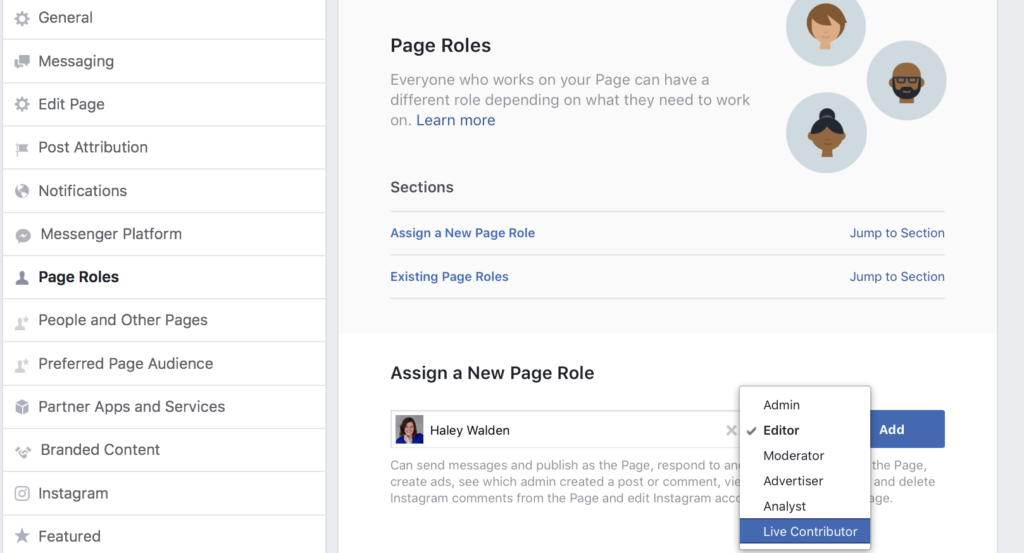
That’s it. If necessary, you can remove them after the Live is over.
Final Thoughts
Facebook Live is an exceptional platform that many businesses are already benefiting from. By keeping an eye out for new features and learning how to use them, you can stay ahead of the learning curve and create the most interesting broadcasts that users are dying to watch. As for the new features part, we’ll keep an eye out, too; we’ll let you know about any new Facebook Live features as they roll out to you.
What do you think? Which of the advanced Facebook Live features is your favorite? How do you use Facebook Live for your business? Let us know what you think!

